REVIEW · BANFF
Banff: Mount Norquay 2.5 or 4-Hour Guided Via Ferrata Climb
Book on GetYourGuide →Operated by Mt Norquay · Bookable on GetYourGuide
You can feel your heartbeat before you ever leave the ground. This guided via ferrata on Mount Norquay is the easiest way to get that high-alpine, steel-on-rock climbing thrill right next to Banff.
I really like the format: pick a shorter intro climb or the longer Ridgewalker route, and you still get the same safety-minded coaching. I also love that the trip is built for first-timers, with gear, training, and a professional guide keeping things calm and controlled.
One thing to weigh: you’re still doing exposed climbing. Even though you’re harnessed and attached to a steel cable, if heights make you panic, you’ll want to think hard before choosing the longer route.
In This Review
- Key Things You’ll Notice on Mount Norquay
- Mount Norquay Via Ferrata: What Makes It Feel Special
- Price and Value: Why This Costs What It Costs
- The Two Routes: Explorer vs Ridgewalker (And How to Choose)
- Explorer Route (about 2 to 2.5 hours)
- Ridgewalker Route (about 3.5 to 4 hours)
- Getting Ready: Check-In, Gear Fitting, and the Chairlift Start
- The Training Moment That Makes the Climb Work
- On the Cliffs: Buttresses, Ladder Holds, and That Suspension Bridge
- The Summit Reward: Ridgewalker Views You Can Actually Enjoy
- Pace, Effort, and What Your Body Will Tell You
- What’s Included on the Day (So You Don’t Overthink It)
- What to Bring: The Small List That Keeps Your Day Smooth
- Who This Tour Is For (And Who Should Rethink It)
- The Staff and Guides: Why People Keep Rebooking
- Should You Book Mount Norquay Via Ferrata?
- FAQ
- How long is the Banff Mount Norquay via ferrata tour?
- Do I need prior climbing or via ferrata experience?
- What are the two route options?
- What’s the difference in altitude and distance between the routes?
- Is the suspension bridge included?
- What safety gear is provided?
- Is transportation included from Banff?
- What should I bring?
- Are food and drinks included?
- What are the age and weight limits?
Key Things You’ll Notice on Mount Norquay
- Two route options: the 2.5-hour Explorer Route or the 4-hour Ridgewalker Route
- Training and coaching first, so you’re not figuring out the system mid-cliff
- A real 30-meter suspension bridge plus steel ladder-style holds
- Chairlift access that saves energy and gives big views early
- Small groups (max 8) with a 1-guide-to-every-8 setup
- Panoramic summit ridge moments when you conquer the Ridgewalker line
Mount Norquay Via Ferrata: What Makes It Feel Special
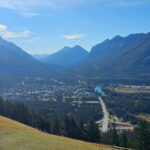
Banff has plenty of wow moments, but this one hits different. You don’t just look up at the Rockies. You move through them, using fixed steel features like you’ve seen in climbing photos.
What makes Mount Norquay such a good intro is the pacing. You ride up by chairlift, get fitted and briefed, then climb in bite-size sections. The gear is there for a reason, and the guide’s job is to make those sections feel learnable instead of scary.
And yes, you get the good stuff: a suspension bridge, steep rock buttresses, and wide summit views. The route is built to let you earn the adrenaline without turning the day into a technical climbing project.
Other via ferrata & climbing tours we've reviewed in Banff
Price and Value: Why This Costs What It Costs

At about $145 per person, this isn’t the cheapest activity in Banff. But it’s not an out-of-reach splurge either, especially when you look at what’s included.
You get:
- A professional guide
- Full safety equipment (harness, helmet, lanyards)
- A chairlift ride to the start area
- A free shuttle bus from Downtown Banff
- Complimentary boot and rainwear rental available
That’s the key value point. You’re paying for risk-managed infrastructure: staff, training, fixed-route maintenance, and hands-on coaching. If you’ve ever done DIY hiking in the Rockies, you know that “just show up” often becomes “rent gear and hope.” This tour removes most of that uncertainty.
Food and drinks are not included, so I plan snacks in advance and I usually budget for a bistro stop after the climb if I’m hungry.
The Two Routes: Explorer vs Ridgewalker (And How to Choose)
You’ll choose between two climbs, and the difference is more than just time.
Explorer Route (about 2 to 2.5 hours)
This is your first-timer friendly option. It’s shorter, covers about 1 kilometer, and gains around 145 meters of elevation. You’ll still get proper exposure to the via ferrata system: climbing pitches, using fixed steel holds, and doing the 30-meter suspension bridge.
If you’re new to heights, want to save energy for other Banff plans, or are traveling with people who prefer a shorter commitment, Explorer makes a lot of sense.
Ridgewalker Route (about 3.5 to 4 hours)
This is the bigger day. It stretches to about 1.4 kilometers and climbs roughly 260 meters. You’ll go farther along the Norquay cliffs and climb multiple buttresses, including the memorial, sunrise, and vista sections. Then you push up toward the Ridgewalker Summit around 2,300 meters and enjoy summit ridge views before descending.
If you want a stronger “I climbed that” feeling and you’re comfortable with more time on exposed terrain, Ridgewalker is the better match.
Other guided tours in Banff
Getting Ready: Check-In, Gear Fitting, and the Chairlift Start
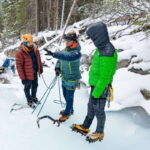
Plan to arrive at least 30 minutes before your departure time. Check in, sign the liability waiver, and meet your guide. Then comes the part that makes first-timers breathe easier: the equipment fitting.
You’ll be set up with a harness, lanyards, and a helmet. The lanyards are what keep you connected to the steel cable system, and once you understand that connection, the whole activity becomes less mysterious.
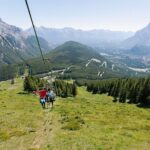
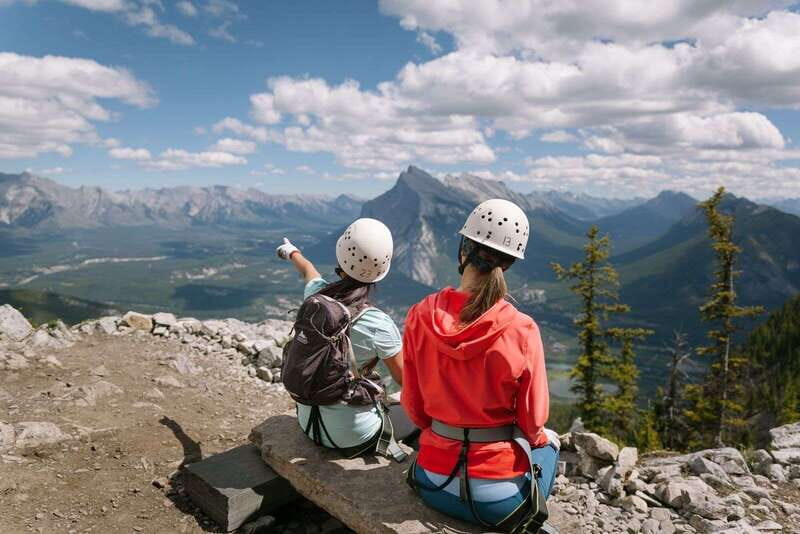
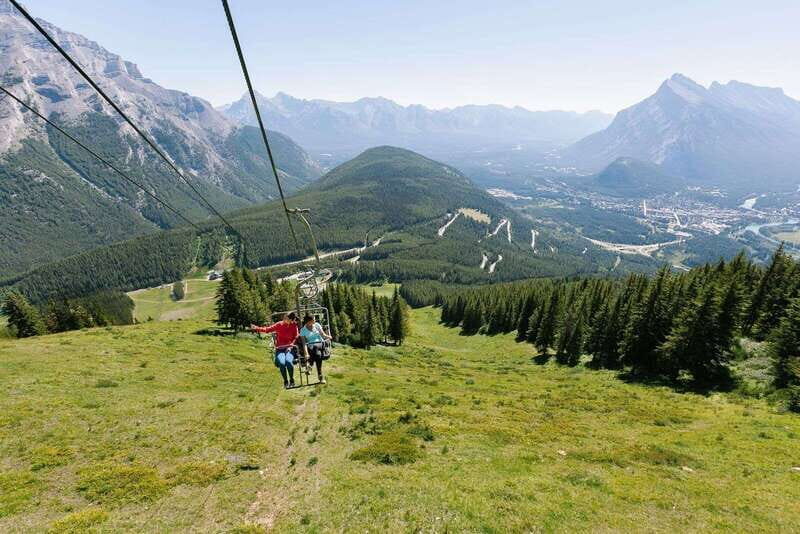
Then you ride the sightseeing chairlift. It’s more than a shortcut. You’re climbing in a high mountain setting, so starting with the chairlift helps you acclimate your nerves. Also, it’s a great “see what you’re about to do” moment. You can grab photos before you ever clip in.
After that, there’s a short walk to the first via ferrata buttress.
The Training Moment That Makes the Climb Work
Before you get fully committed to the route, you get coaching. You’ll start on a practice wall (especially on the longer Ridgewalker route) so you can learn how the holds work and how to move while attached.
This is where the guide quality really shows. Guides like Katsu, Amanda, Zack, Alex, Ben, Jordan, Lucy, and Luke were repeatedly praised for being both competent and reassuring. Even when the route is steep, the common thread is clear: you get taught, not thrown into it.
Practical advice I’d take into this:
- Listen closely during the safety briefing, even if you think you’ll remember later.
- Ask for demonstrations if you’re unsure about foot placement or clipping rhythm.
- Treat the first section like training, not a performance.
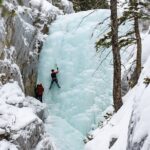
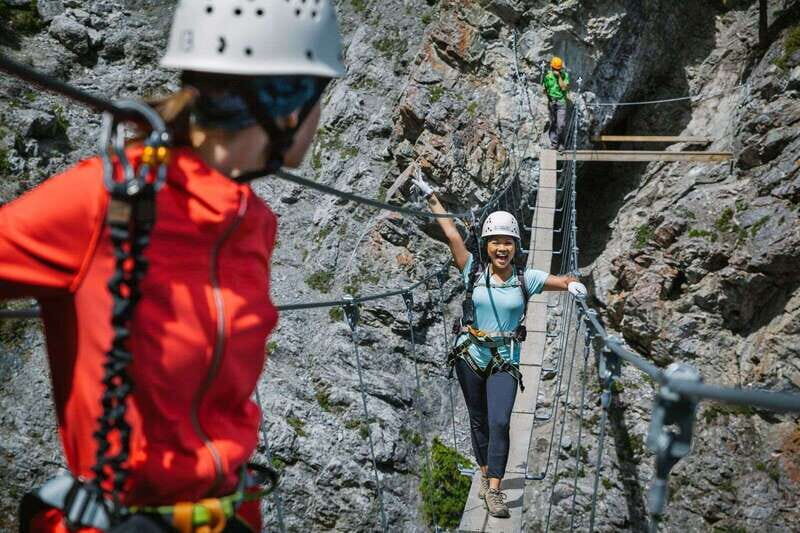
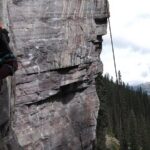
On the Cliffs: Buttresses, Ladder Holds, and That Suspension Bridge
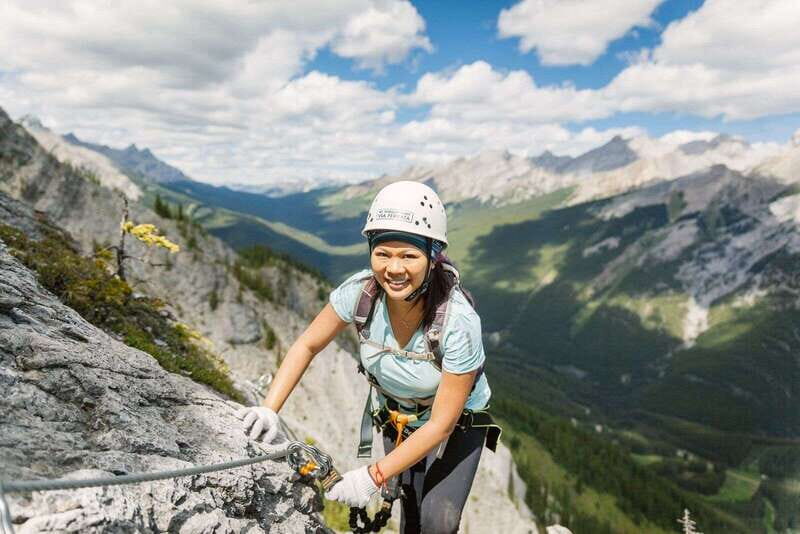
Once you reach the climb, the via ferrata setup does the heavy lifting. You’ll use strategically placed steel ladder holds and fixed features designed for steady movement.
The buttresses feel different from hiking trails. Hiking is about rhythm on the ground. Here you’re managing three things at once: your footing, your balance, and where your cable connection is guiding you.
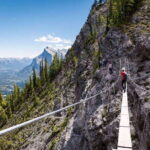
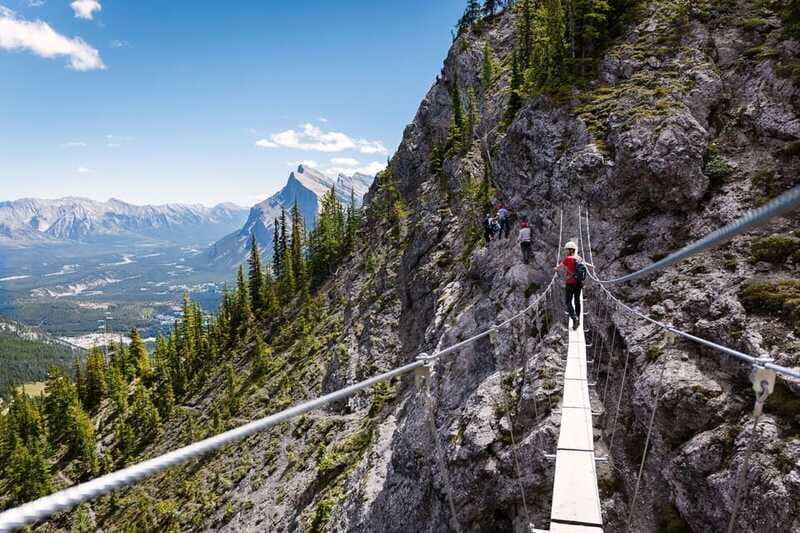
Then there’s the signature moment: a 30-meter suspension bridge. This is usually the psychological peak of the day. The bridge adds movement and height sensations, even if you’re safely clipped in.
If you get nervous on bridges, I’d focus on one steady habit: place your feet deliberately and keep your eyes moving rather than locking onto the drop. You don’t need to stare at the abyss to cross it. You just need to keep moving.
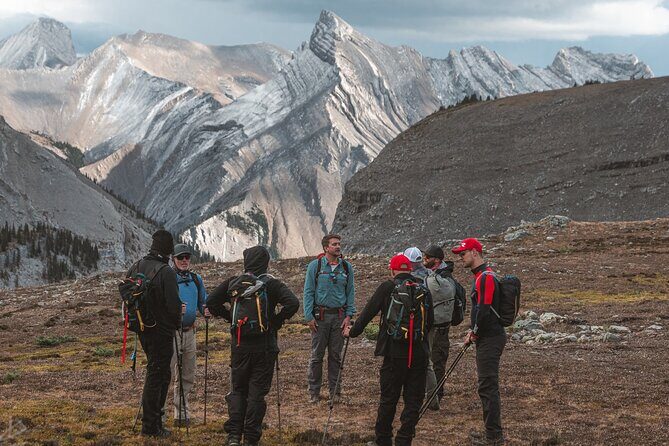
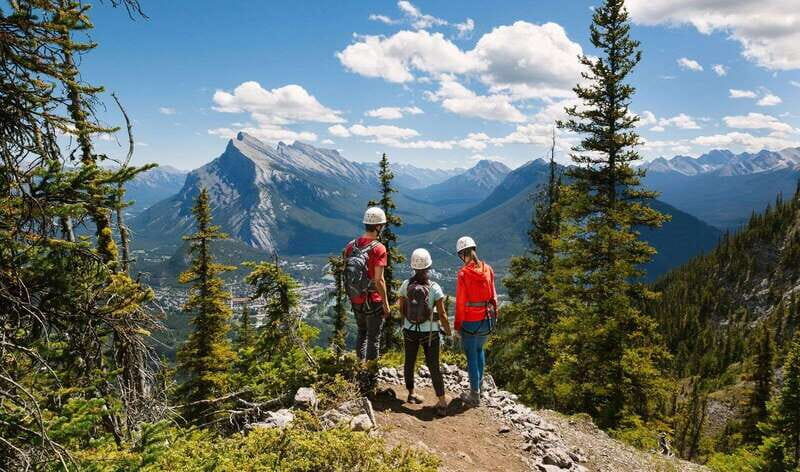
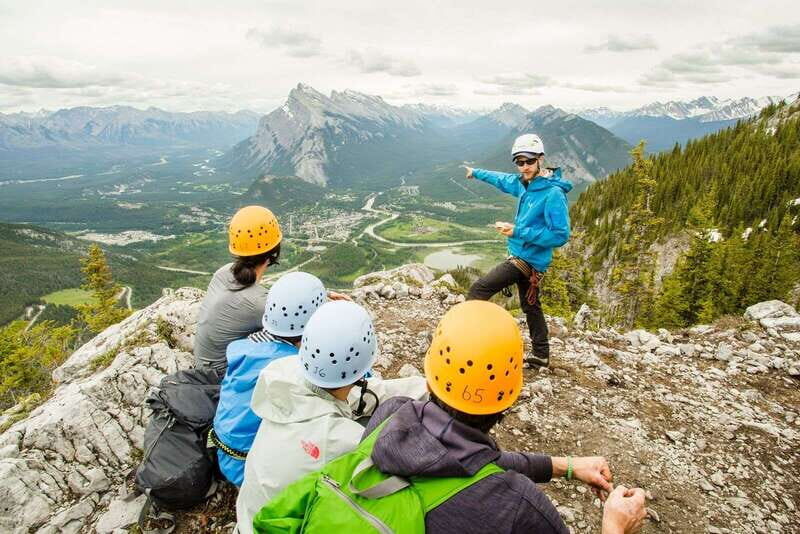
The Summit Reward: Ridgewalker Views You Can Actually Enjoy
On the Ridgewalker Route, the goal is more than finishing. It’s getting to the summit ridge area around 2,300 meters and soaking in the panoramic Rockies view.
Expect a real sense of achievement at the top. You’ll have time for photos before you head back down. And because this is a via ferrata day instead of a long glacier expedition, the views land while you still feel energized.
One travel reality: weather can affect visibility. Some people noted hazy conditions from wildfires. You can’t control the sky, but you can control your plan. If you see a clear window, that’s when you do Ridgewalker.
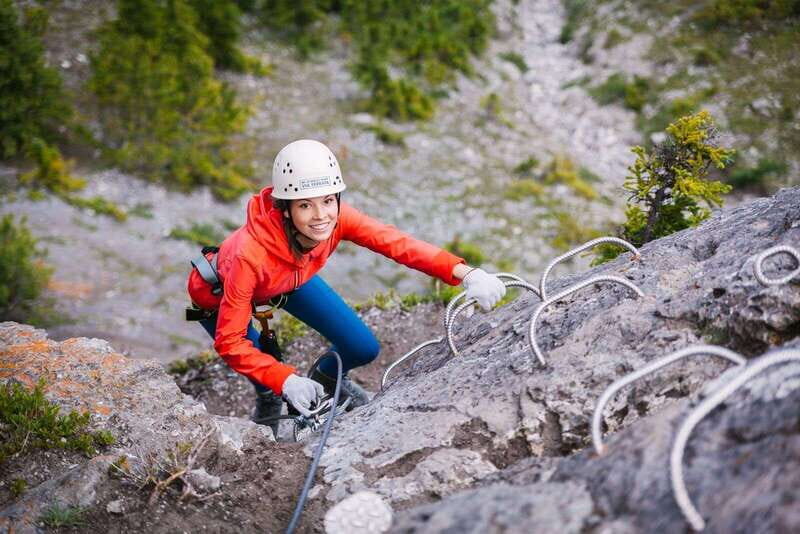
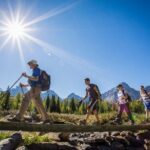
Pace, Effort, and What Your Body Will Tell You
You won’t need prior climbing experience. But you should still expect effort.
People often describe it as exhilarating but physical. You may be using smaller muscle groups more than you expect: legs for controlled stepping, arms and core for balance and stability, and feet for constant attention.
That said, the routes are managed so first-timers can succeed. Many guides were specifically praised for adjusting pace for the group and building confidence for nervous climbers. Some groups finished Ridgewalker faster than expected, while others needed more time. Either way, you’ll feel that “earned it” fatigue in the end.
I’d come ready to work. Hydration matters, and so do snacks.
What’s Included on the Day (So You Don’t Overthink It)
Included basics:
- Expert guide
- Harness, helmet, lanyards
- Chairlift to the starting area
- Free shuttle bus from Downtown Banff
- Complimentary hiking boot and rainwear rental (sizing isn’t guaranteed)
Optional-but-wise:
- Snacks from home or purchased snacks at the bistro afterward
- A rain layer even if it looks fine at check-in
What isn’t included:
- Food and drinks (but you can buy food at Cliffhouse Bistro after the tour)
For me, the “included” list is what makes this feel fair. You’re not paying extra to access the fixed climbing system and guidance.
What to Bring: The Small List That Keeps Your Day Smooth
Bring:
- Snacks
- Water
- Rain gear
- Hiking shoes (and make sure they’re approved by staff)
If you’re using the complimentary boot rental, don’t assume perfect sizing. I’d still wear the best footwear you can and treat rentals as a backup, not a guarantee.
Also, if you’re prone to cold hands, I’d consider layers. You’re not just walking. You’re paused and moving on a cliff, and mountain weather can shift quickly.
Who This Tour Is For (And Who Should Rethink It)
This is a strong fit for:
- People with no via ferrata experience
- Anyone who wants a guided, structured introduction to alpine climbing
- Travelers who like adrenaline but prefer safety systems and coaching
- Groups who want a small-group experience rather than a big bus tour
It’s not suitable for:
- Children under 12
- People with mobility impairments
- People outside the 40 kg to 140 kg weight range
If you’re nervous about heights, don’t ignore that feeling. Many guides are very good at talking you through it, but heights don’t care about your confidence story. Choose the Explorer Route if you’re unsure, and be honest with your guide early.
The Staff and Guides: Why People Keep Rebooking
The reviews share a pattern: the guides are both technically solid and socially smart. People mentioned guides who were silly but focused, patient with nerves, and attentive to pacing.
You’ll also notice a theme of photo help. Several guides were singled out for capturing photos for you while you’re on the route. That matters, because via ferrata isn’t the moment to fumble with your phone.
If you have the option to select or request a guide, that can be worth considering. Names that came up often included Katsu, Amanda, Zack, Alex, Ben, Jordan, Luke, Selina, and Celine. Even without a request, you’re still getting a guide trained to manage mixed comfort levels inside a small group.
Should You Book Mount Norquay Via Ferrata?
Book it if you want:
- A guided first via ferrata with real safety equipment and a professional guide
- The chance to cross a 30-meter suspension bridge
- Rockies views that happen while you’re still on the move, not after you get back to the parking lot
- A smaller group day with chairlift convenience
Skip it or choose very carefully if:
- Heights trigger panic for you
- You don’t want any exposed sections, even with a harness
- You’re short on time and the Ridgewalker Route sounds like a commitment you won’t enjoy
My take: if you’re sitting on the fence, this is one of those Banff activities that makes the trip feel more active and more memorable. The value comes from the setup: chairlift access, all gear, a fixed route, and coaching that turns a scary-looking climb into a doable day.
FAQ
How long is the Banff Mount Norquay via ferrata tour?
The tour runs from about 150 minutes up to 4 hours, depending on whether you book the shorter Explorer Route or the longer Ridgewalker Route.
Do I need prior climbing or via ferrata experience?
No previous experience is needed. You’ll get training and safety instruction before you climb.
What are the two route options?
You can choose the 2.5-hour Explorer Route or the 4-hour Ridgewalker Route. Explorer includes a shorter climb and the suspension bridge, while Ridgewalker is longer and includes a summit ridge area.
What’s the difference in altitude and distance between the routes?
Explorer covers about 1 kilometer with about 145 meters of elevation gain. Ridgewalker covers about 1.4 kilometers with about 260 meters of elevation gain.
Is the suspension bridge included?
Yes. The experience includes crossing a 30-meter suspension bridge.
What safety gear is provided?
The tour includes all safety equipment: harness, helmet, and lanyards.
Is transportation included from Banff?
Yes. There is a free shuttle bus from Downtown Banff, and you also ride a sightseeing chairlift to reach the climbing start area.
What should I bring?
Bring snacks, water, rain gear, and suitable hiking footwear. Complimentary boots may be available, but sizing cannot be guaranteed.
Are food and drinks included?
No. Food and drinks are not included, but you can purchase items at the Cliffhouse Bistro after your tour.
What are the age and weight limits?
Minimum age is 12. Weight must be between 40 kg and 140 kg.